.png?height=120&name=k12-4%20(2).png)
Let’s get started! We are going to walk you through setting up Google Drive for desktop, syncing your hard drive files to Google Drive, resume syncing files to Google Drive and verifying that files are syncing to Google Drive.
Sign into Google Drive for Desktop
Note: If you have already set up Google Drive for Desktop, skip to Resume Syncing Files to Google Drive step below.
- Click on the Start button in the lower left corner and type in Google Drive and Open.
- Welcome to Google Drive! Click Get Started button
- Click Sign in and a Microsoft Edge screen will appear.

3. If you are prompted, get rid of Pesky Microsoft Edge
-
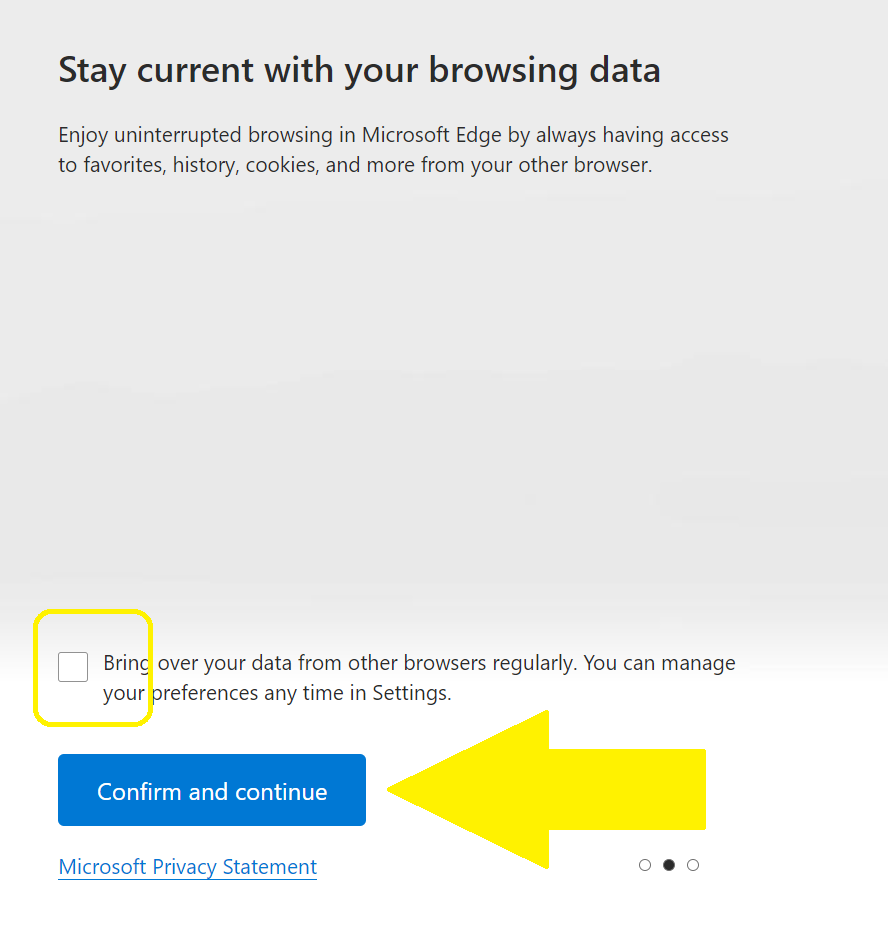
- Click the gray ‘Start without your data’ button at the bottom.
-
- Uncheck the box for “Bring over your data from other browsers regularly…”
- Click the confirm and continue button
5. Sign in to Google Drive for desktop using your school email account. Click Next and enter your password. It will prompt 2 factor authentication, have your authenticator app ready to get the code to enter in.
6. Make sure that you downloaded this app from Google
-
- Click Sign in
- Success!! Google Drive for desktop is now active on your computer!
7. Welcome! Your drive files are just a click away. Your files will show up in File Explorer without taking up hard drive space. Click Next
8. Make important files available for offline use. Your files are otherwise only available when you have an internet connection. Click Next
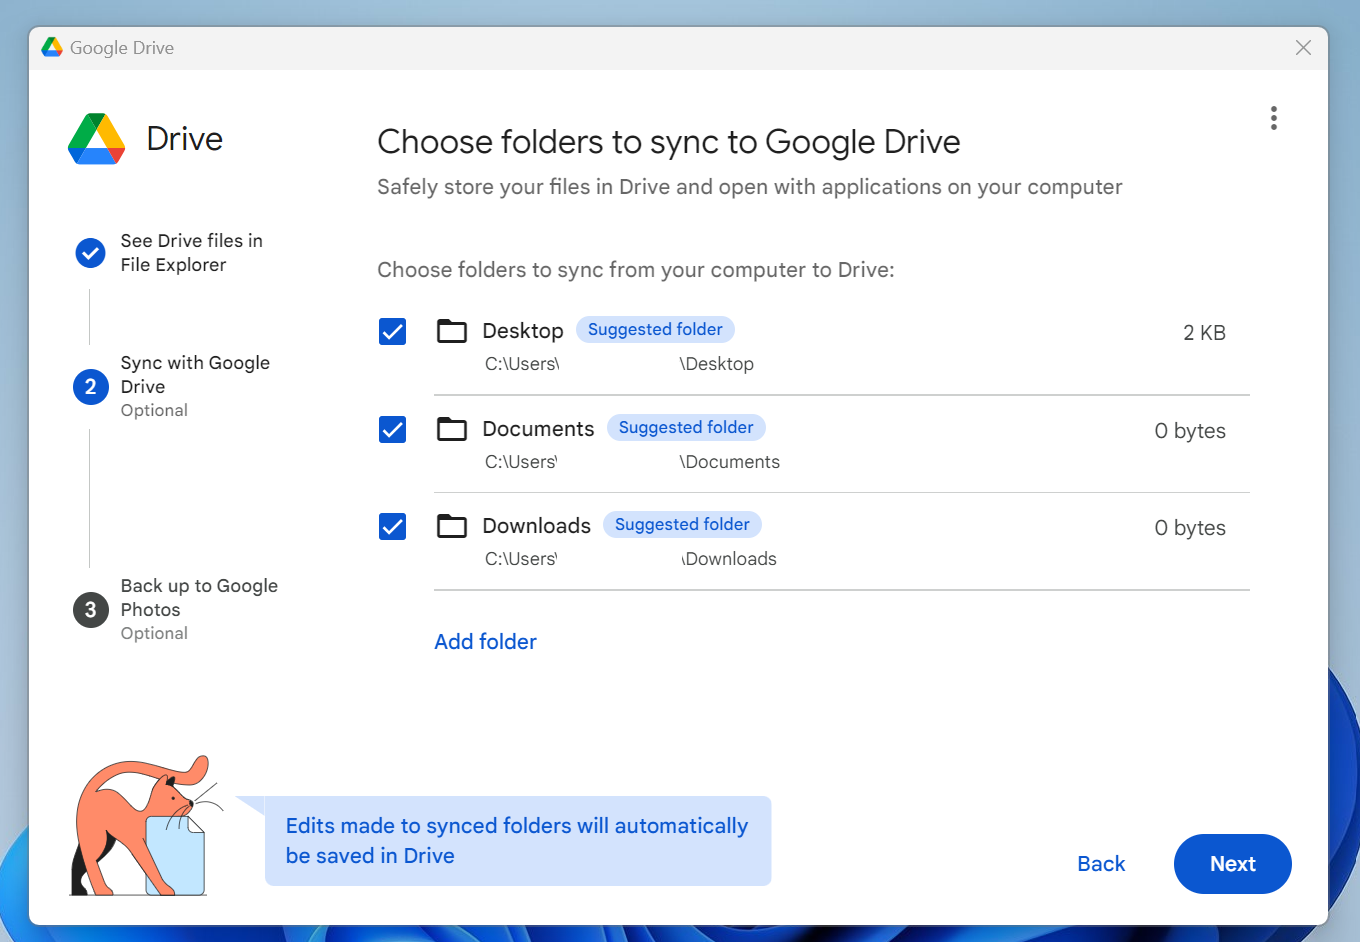
9. Choose folders you would like to sync to Google Drive. Any files that you put into these folders will be automatically backed up to the cloud over time.
-
- Check all the boxes
- If you have more folders on your desktop or else where on your computer that you need backed up, click on the Add Folder text and select the folders you want synced.
- Click Next
- Click Got it button
-
- Check both boxes and click Next
- Click Open Drive
Stream File Explorer Folders to Google Drive
Click on the little up arrow in the system tray to the bottom right on the taskbar then click on the Google Drive icon.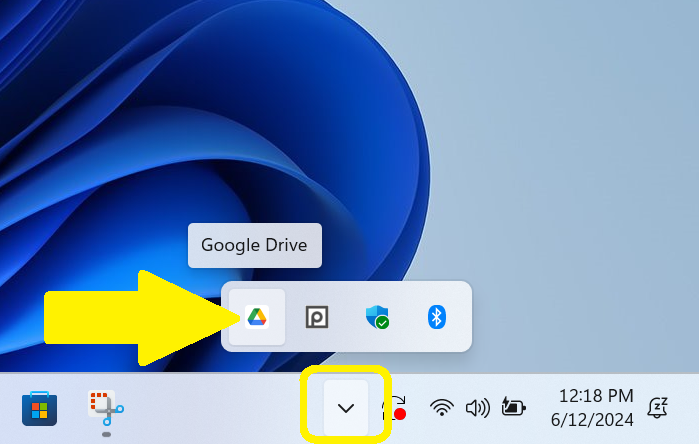
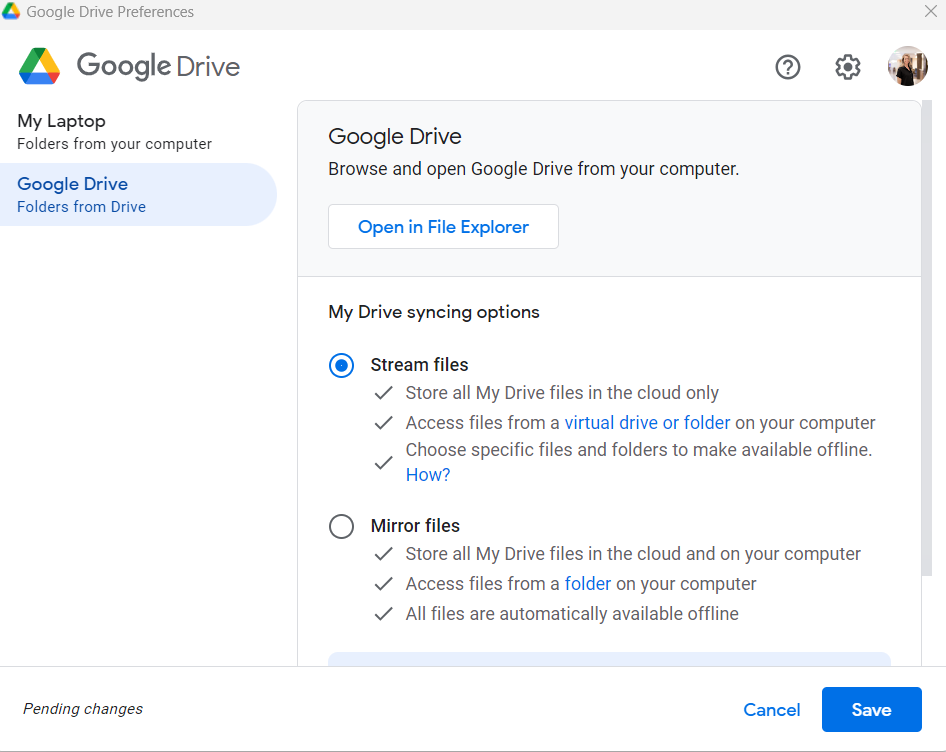
- Click on the settings gear icon in the top right corner and select preferences
- Select the Google Drive tab on the left side
- Select the Stream files option
- Click continue and Save
- Click Restart now for changes to take effect
You have now set up Google Drive to sync with your File Explorer!
If you have already completed the above steps, you may need to just resume syncing files. Move on to the next step.
Resume Syncing Files to Google Drive
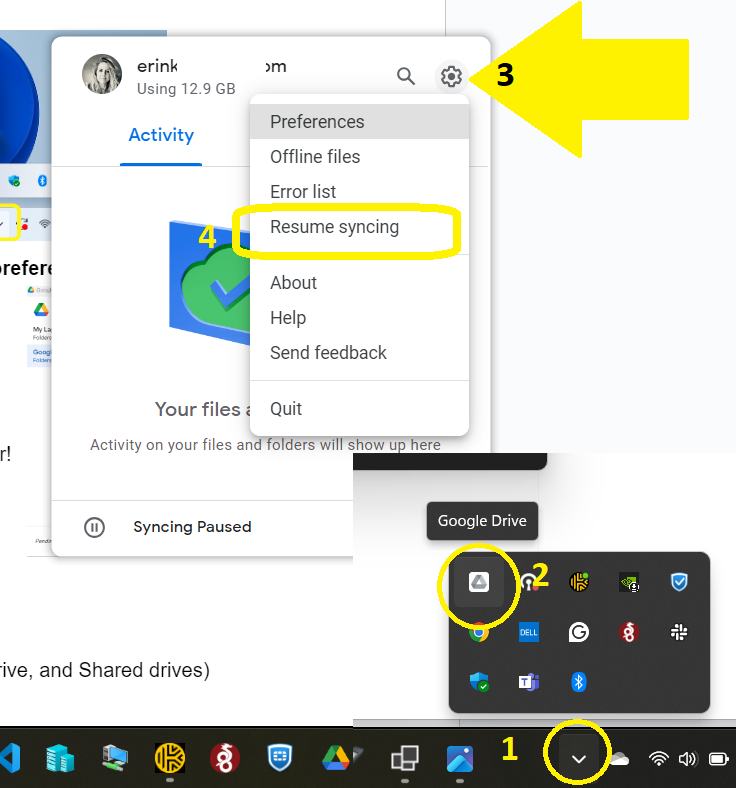
- Click on the little up arrow in the system tray to the bottom right on the taskbar
- Click on the Google Drive icon
- Click on the settings gear icon in the top right corner
- Select Resume syncing
Verify That Files Are Syncing to Google Drive
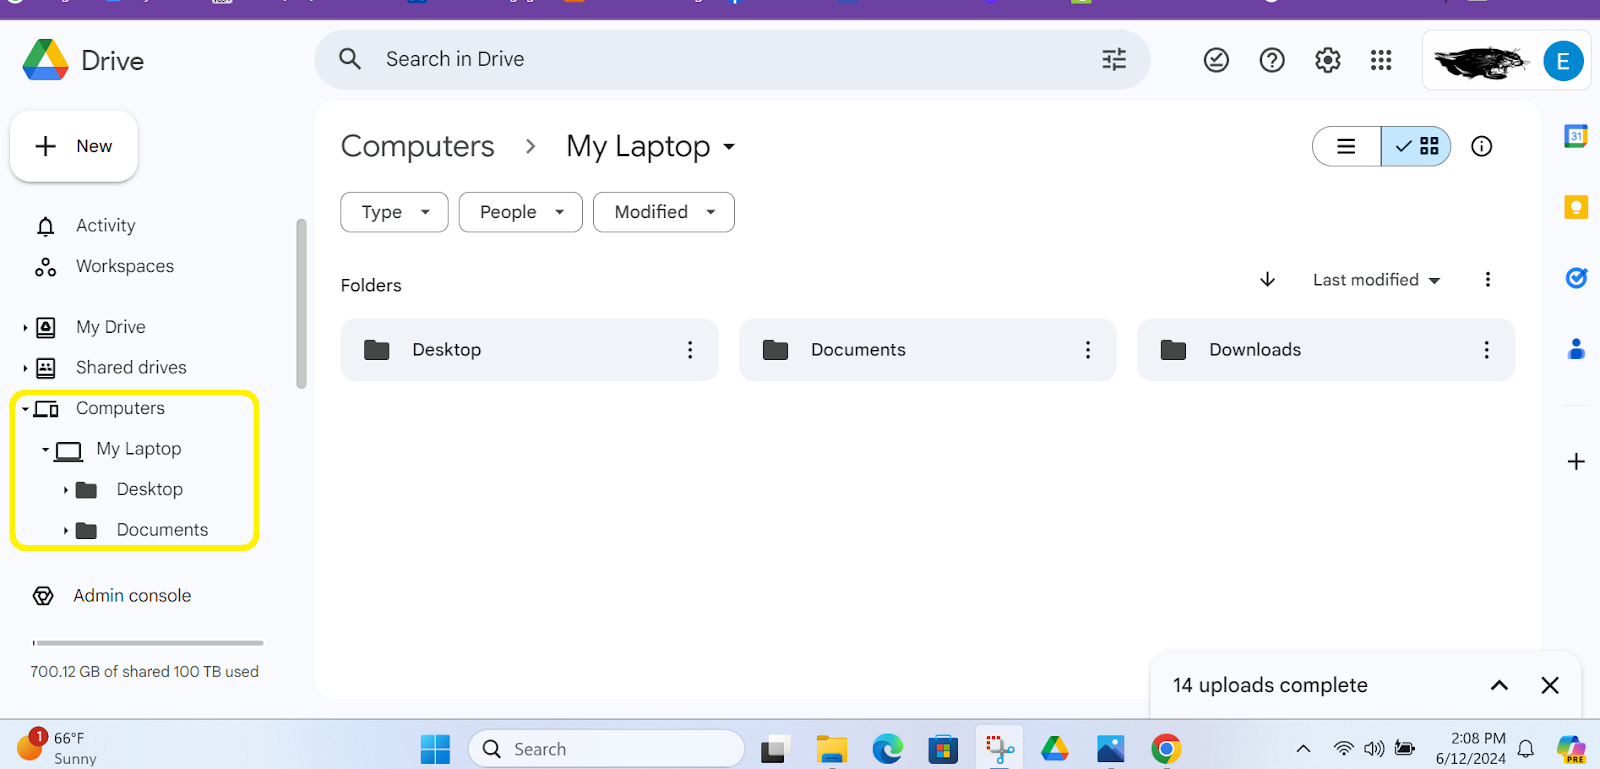
- Open Google Chrome>sign in>Google Drive
- On the left side menu, scroll down to to Computers (under My drive, and Shared drives)
- Click on the drop down to expand and click on My laptop. Here you will see all the folders that you synced from your File Explorer (Desktop, Downloads, Documents, Pictures, etc.).
- The amount of time it takes to sync will depend on how many files you are syncing. Be patient!
You can now access all of the files on your hard drive right here in Google Drive from any computer and are ready for the Windows 11 update!